Requirements:
Blender (latest version is recommended) - https://www.blender.org/download/
otools latest version (0.177 or higher) - https://bitbucket.org/fifam/otools/downloads/
PES to FIFA/FIFAM converter - https://www.dropbox.com/s/6if51iob6swac ... 1.zip?dl=1
Prepare your workspace
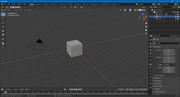
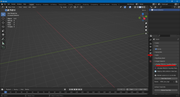
Install Blender if it's not installed yet. After Blender is installed, open it. You will see the default scene with cube, camera and light:
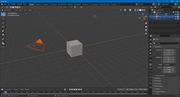
Press "A", this will select all objects in the scene:
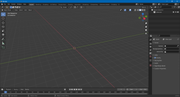
Now press "Delete", this will delete selected objects. The scene will be empty then:
Now go to File>Defaults>Save Startup File, Save Startup File
Install Blender add-on ("PES_Face_Hair_Modifier_Modified_Blender_2.80.zip") from "PES_to_FIFA_FIFAM/Blender scripts":
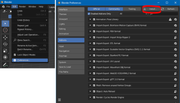
In Blender, go to Edit>Preferences..., Add-ons, Install..., select the .zip file. Enable the add-on after it's installed.
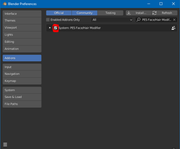
If Add-On was correctly installed, you will see it in the Scene Properties tab:
Note that add-on works only with Blender 2.80+
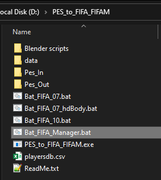
Unpack PES to FIFA/FIFAM converter somewhere.
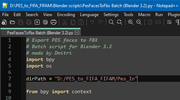
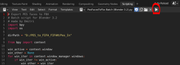
Open "PES_to_FIFA_FIFAM/Blender scripts/PesFacesToFbx Batch (Blender 3.2).py" in Notepad and change the path here with path to your "Pes_In" folder (note: use forward slashes in the path):
Unpack OTools folder somewhere.
Open "PES_to_FIFA_FIFAM/Bat_FIFA_Manager.bat" in Notepad and change the path here with path to your OTools folder (it's a folder where otools.exe is placed):
Update: OTools 0.177 is now required

Conversion process
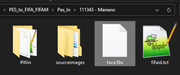
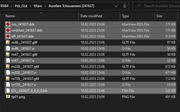
Step 1. Put player folders which you want to convert to "PES_to_FIFA_FIFAM/Pes_In" folder.
The structure of folders will look like this:
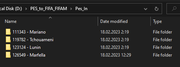
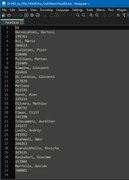
Names of folders are not important, I use PES ID - Name for better navigation.
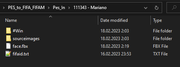
In each folder you need to create a file "fifaid.txt" with player's FIFA id inside it.
If player is not present in FIFA database, you will also need to create:
- "skin.txt" file with skin tone ID (1 to 10), you can check skin tone IDs in "PES_to_FIFA_FIFAM/data/fifa10" folder (files 1.tga - 10.tga)
- "name.txt" file with player name
- "eyes.png" file for player eyes, can be taken from "PES_to_FIFA_FIFAM/data/fifa10/eyes" and renamed.
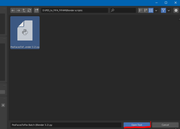
Example of folder for player who's not in FIFA database (300001 is a fake ID):

Step 2. Export .fpk to .fbx in Blender.
You can do this:
2.1 With Blender batch script
In Blender, open Scripting tab, Text>Open...
select "PES_to_FIFA_FIFAM/Blender scripts/PesFacesToFbx Batch (Blender 3.2).py"
Run script:
Blender will freeze for some seconds (depends on how many faces must be exported), you will understand that script is finished after Blender will unfreeze.
When script is finished, you will see .fbx files in player folders:
Note that script works only with Blender 3.2+
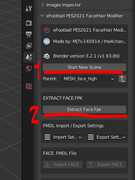
2.2 Manually exporting each face
If your Blender version is lower than 3.2 and you can't use the batch script, you need to export each face manually. For each face, you need to do the following:
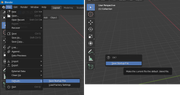
First, press "Start New Scene" button.
Second, press "Extract Face.Fpk" button.
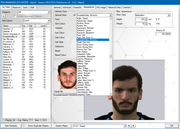
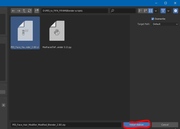
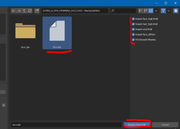
Select .fpk file (it's placed in #Win subfolder of player's folder), check all checkboxes on the right and press Extract button.
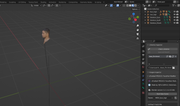
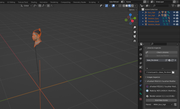
You will see the face in 3D-View:
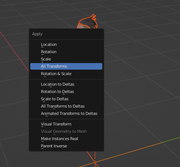
Now, in 3D-View, press "A", this will select all objects in the scene.
Now press "Ctrl+A" and select "All Transforms" in the list:
Now go to File>Export>FBX (.fbx)
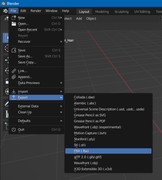
Export it as "face.fbx" to player's folder:
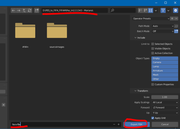
The file is exported.
Step 3. Launch the converter
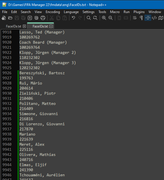
Run "PES_to_FIFA_FIFAM/Bat_FIFA_Manager.bat"
Step 4. Install files into the game
Copy all .O, .FSH and .DDS files from all subfolders in "PES_to_FIFA_FIFAM/Pes_Out/fifam" to "data/assets" folder in your game.
tip: if you have multiple folders, you can search for all files in subfolders with "*.*", then sort by type, select all .o, .fsh, .dds and copy them.
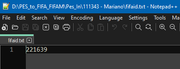
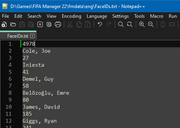
In "PES_to_FIFA_FIFAM/Pes_Out/fifam" you will also have "FaceIDs.txt" file. It contains face IDs which were converted. The first line is a number of converted faces (16 here)
You need to merge this file with game's FaceIDs file (placed here: "%GAME FOLDER%/fmdata/eng/FaceIDs.txt")
Note that this file is used for all languages (so no need to duplicate it to other language folders).
Update the number of faces on the first line (4962 + 16 = 4978)
And put your list at the end of original list.
Now you can assign faces in the Editor.